Blog
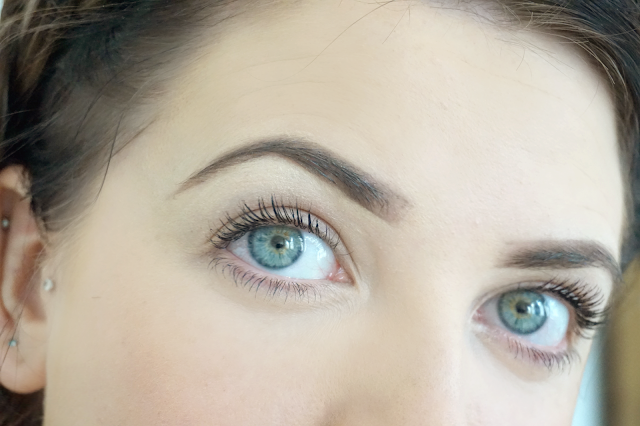
7 Steps To Ombre Brows
Tuesday, 21st June, 2016
I’ve tried a number of brow products in the past from kohl pencils to powders to gels to fibres to creams but I’ve never found anything as easy and as effective at the Beverly Hills Dip Brow Pomade.
The majority of people I know swear by the product (as do I) but for those who don’t it’s mainly because they just can’t work out the best way to use it and find it too pigmented, too dark or too thick.
My brow routine takes me minutes to complete and you can adapt it to the type of brow products you use. So hopefully it should give those who can’t get to grips with brow pomades some tips and tricks of how to use it in the best way as well as showing you how I create that ombre brow.
To start with I’m using the Beverly Hills Dip Brow Pomade in Ash Brown and the Beverly Hills Duo Brow Brush in #14.
How to create ombre brows:
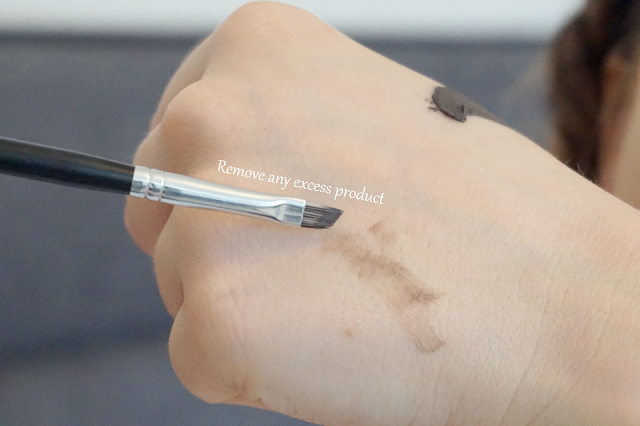
Step 1: Comb the brows to shape and neaten before taking a small amount of pomade and use the back of your hand to remove the excess
Step 2: Draw a line (under the brow) from just after the inner brow hairs to the corner of the arch
Step 3: Next decide on the shape of the brow tail and outline around the brow hairs/ fill in
Step 4: Draw a line from the tail corner to just over half way across the brows and again fill in any sparse areas
Step 5: Remove any excess product from the brush onto the back of your hand and smudge across the product already applied to half the brow to create an ombre effect towards the inner brow. Add a couple brow faux brow hairs within the lighter part of the inner brow.
Step 6: Comb through the brow to neaten and blend any excess product onto the hairs. At this point you can either leave the brows as they are or set them with a brow mascara.
Step 7: Use a light cream concealer to highlight around the brow and strengthen the shape. Blend the product into your foundation and powder over.
Beki Xo


